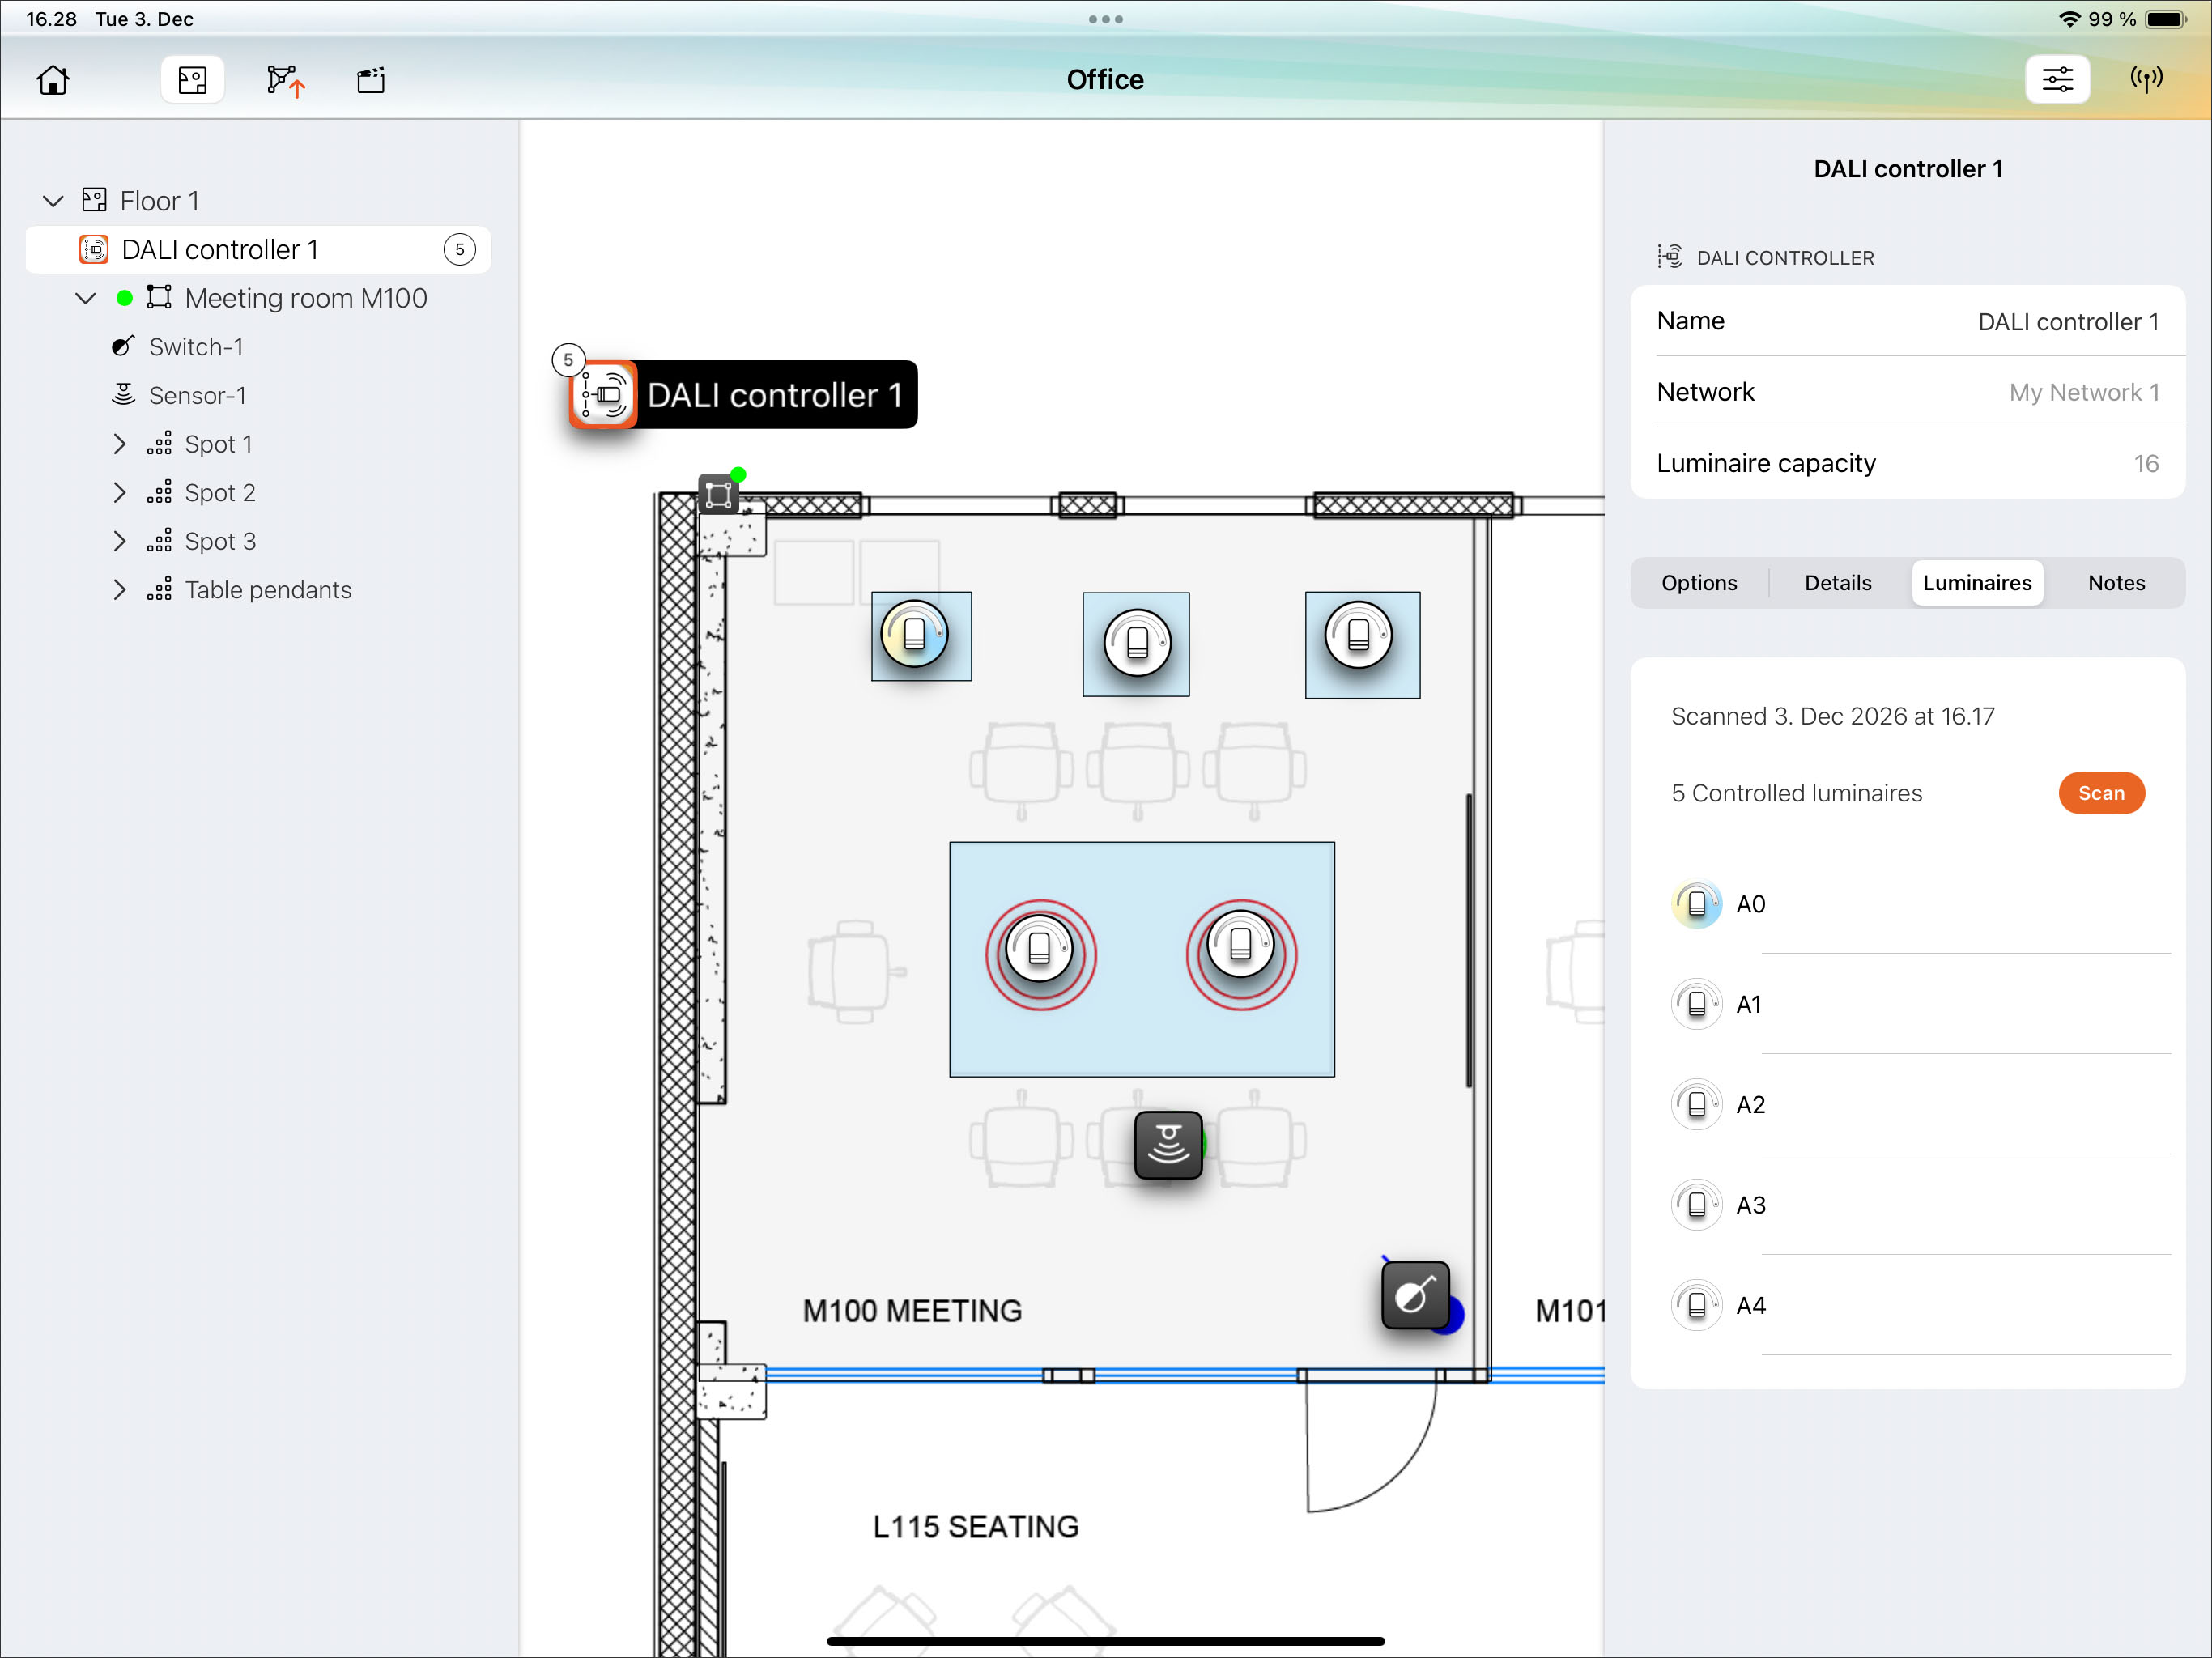
Pairing Casambi DALI Controllers
Pairing a Casambi DALI controller (Salvador series) follows the same process as pairing any other Casambi Ready device from the Nearby Devices list—either by dragging and dropping the device or by tapping the link icon.
A DALI controller can be paired in two ways:
- Onto an Existing Placeholder: Drop the physical device onto a pre-configured Casambi DALI controller placeholder (the same method used for sensors or switches).
- As a New Device: Pair the controller directly into the layout without a pre-existing placeholder.
DALI driver discovery process
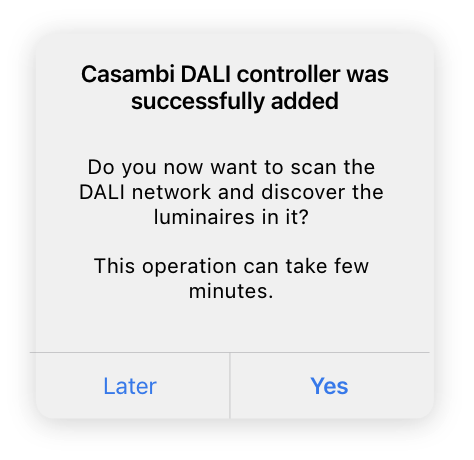
Step 1: Entering the Discovery view
At the end of pairing of a Casambi Salvador unit, Casambi Pro will ask if you want to proceed to discover the DALI drivers in the DALI network. The discovery can be done also later if you don’t want to run the discovery immediately when pairing the Salvador unit.
The discovery view can also be accessed at any point from the DALI controller's properties pane.
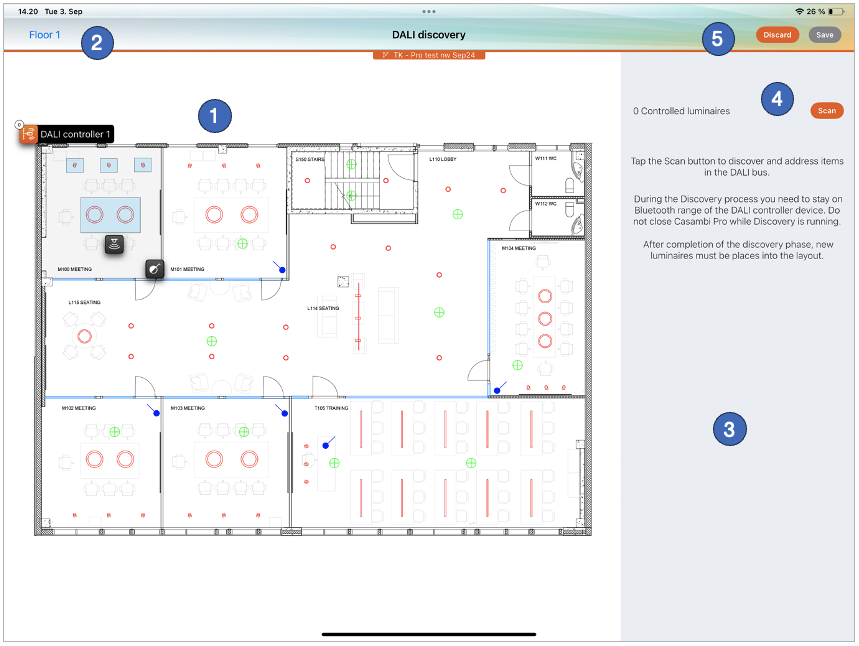
DALI discovery view
- Network Scope: Displays only the spaces and luminaire groups assigned to the active network.
- Layout Navigation: Allows switching between layouts if the network spans across multiple layout plans.
- Discovered Drivers List: Displays all discovered DALI drivers (luminaires) in the right-hand pane once scanning is complete.
- Scan Button: Initiates the DALI bus discovery process.
- Action Controls: Provides options to Save or Discard the discovered DALI configuration.
Step 2: Running DALI discovery
When the Scan button is tapped, the system searches for DALI drivers connected to the Casambi Salvador unit's DALI line. The discovery process can take up to one minute. Discovered drivers (luminaires) appear in the right-hand pane.
Once discovery is complete, the following prompt appears:
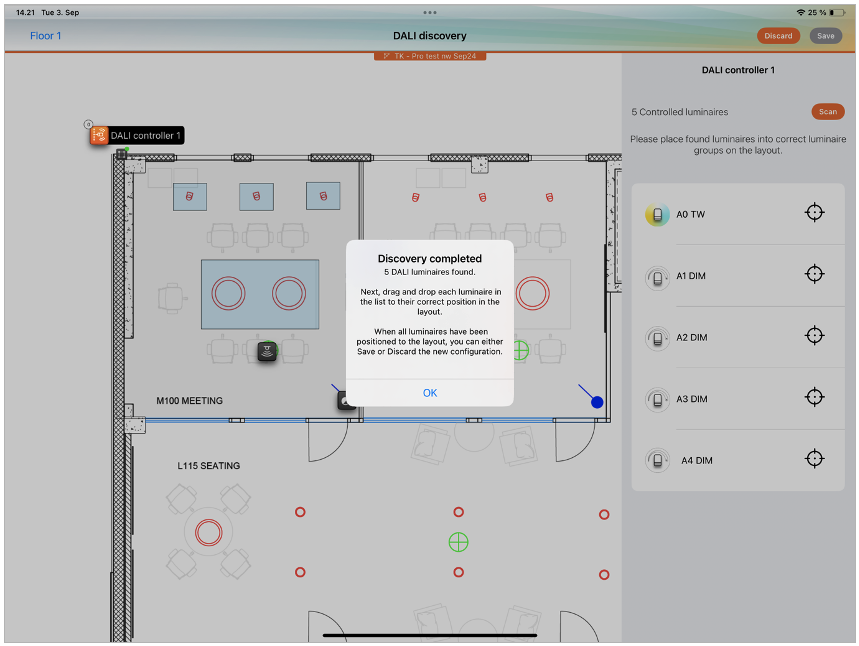
Step 3: Assign DALI luminaires to luminaire groups in layouts
Once the scan is complete, all detected DALI drivers (luminaires) appear in the right-hand pane. If any expected drivers are missing, tap Scan again to re-run the discovery process.
Next, assign each discovered device to its corresponding luminaire group. Devices can be assigned either by tapping the Target icon or by dragging and dropping them directly onto the floor plan. All devices must be assigned to a luminaire group before the configuration can be saved.
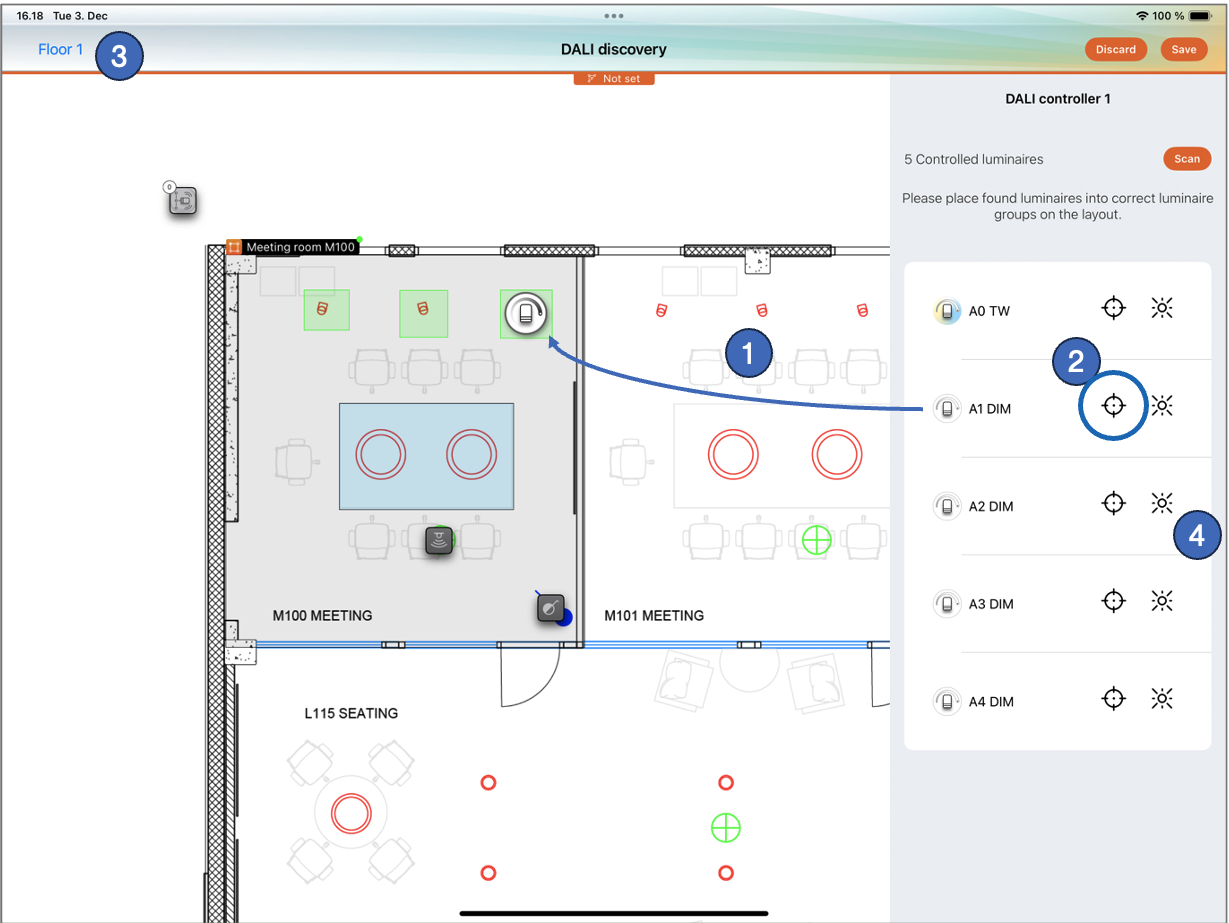
Placing DALI Luminaires on the Floor Plan
- Drag-and-Drop: Drag a luminaire from the list and drop it onto the target luminaire group in the floor plan.
- Target Icon Assignment: Tap the Target icon next to a luminaire row, then select the target group from the prompt.
- Layout Selection: Switch the active layout view using the dropdown in the top-left corner. (Note: Only layouts containing luminaire groups assigned to the same network as the DALI controller are listed).
- Identify Fixture: Tap the Blink icon next to a luminaire to flash the physical fixture for easy identification.
Step 4: Save the DALI Configuration
Once all DALI drivers (luminaires) have been assigned to luminaire groups, save or discard the setup using the Save or Discard buttons in the top-right corner of the screen.
After saving the configuration, all DALI luminaires appear in the project layout and can be controlled and configured just like standard Casambi Ready luminaires.
DALI Controller properties after adding DALI drivers: