Adding devices to networks
Casambi-enabled devices can only be added to networks using Casambi Pro for iOS.
Project prerequisites for pairing devices
- The project must have at least one layout containing at least one space and one luminaire group.
- There must be a placeholder network (created in Casambi Pro for Windows) or an existing Pro network.
- The space which you want to pair the device to must be linked to a placeholder or active network.
Controllers (sensors and switches) are paired to spaces, while luminaires are paired directly to luminaire groups within spaces. Controllers can be paired on top of a placeholder, or as a new device.
Casambi Cloud Gateways and Casambi DALI Controllers (Salvador series) are paired directly to networks and can be placed anywhere within a layout. While you can pre-configure them as placeholders in Casambi Pro for Windows to be replaced by physical hardware during commissioning, you can also pair Cloud Gateways and DALI controllers directly without pre-existing placeholders.
Pairing options on iPad
-
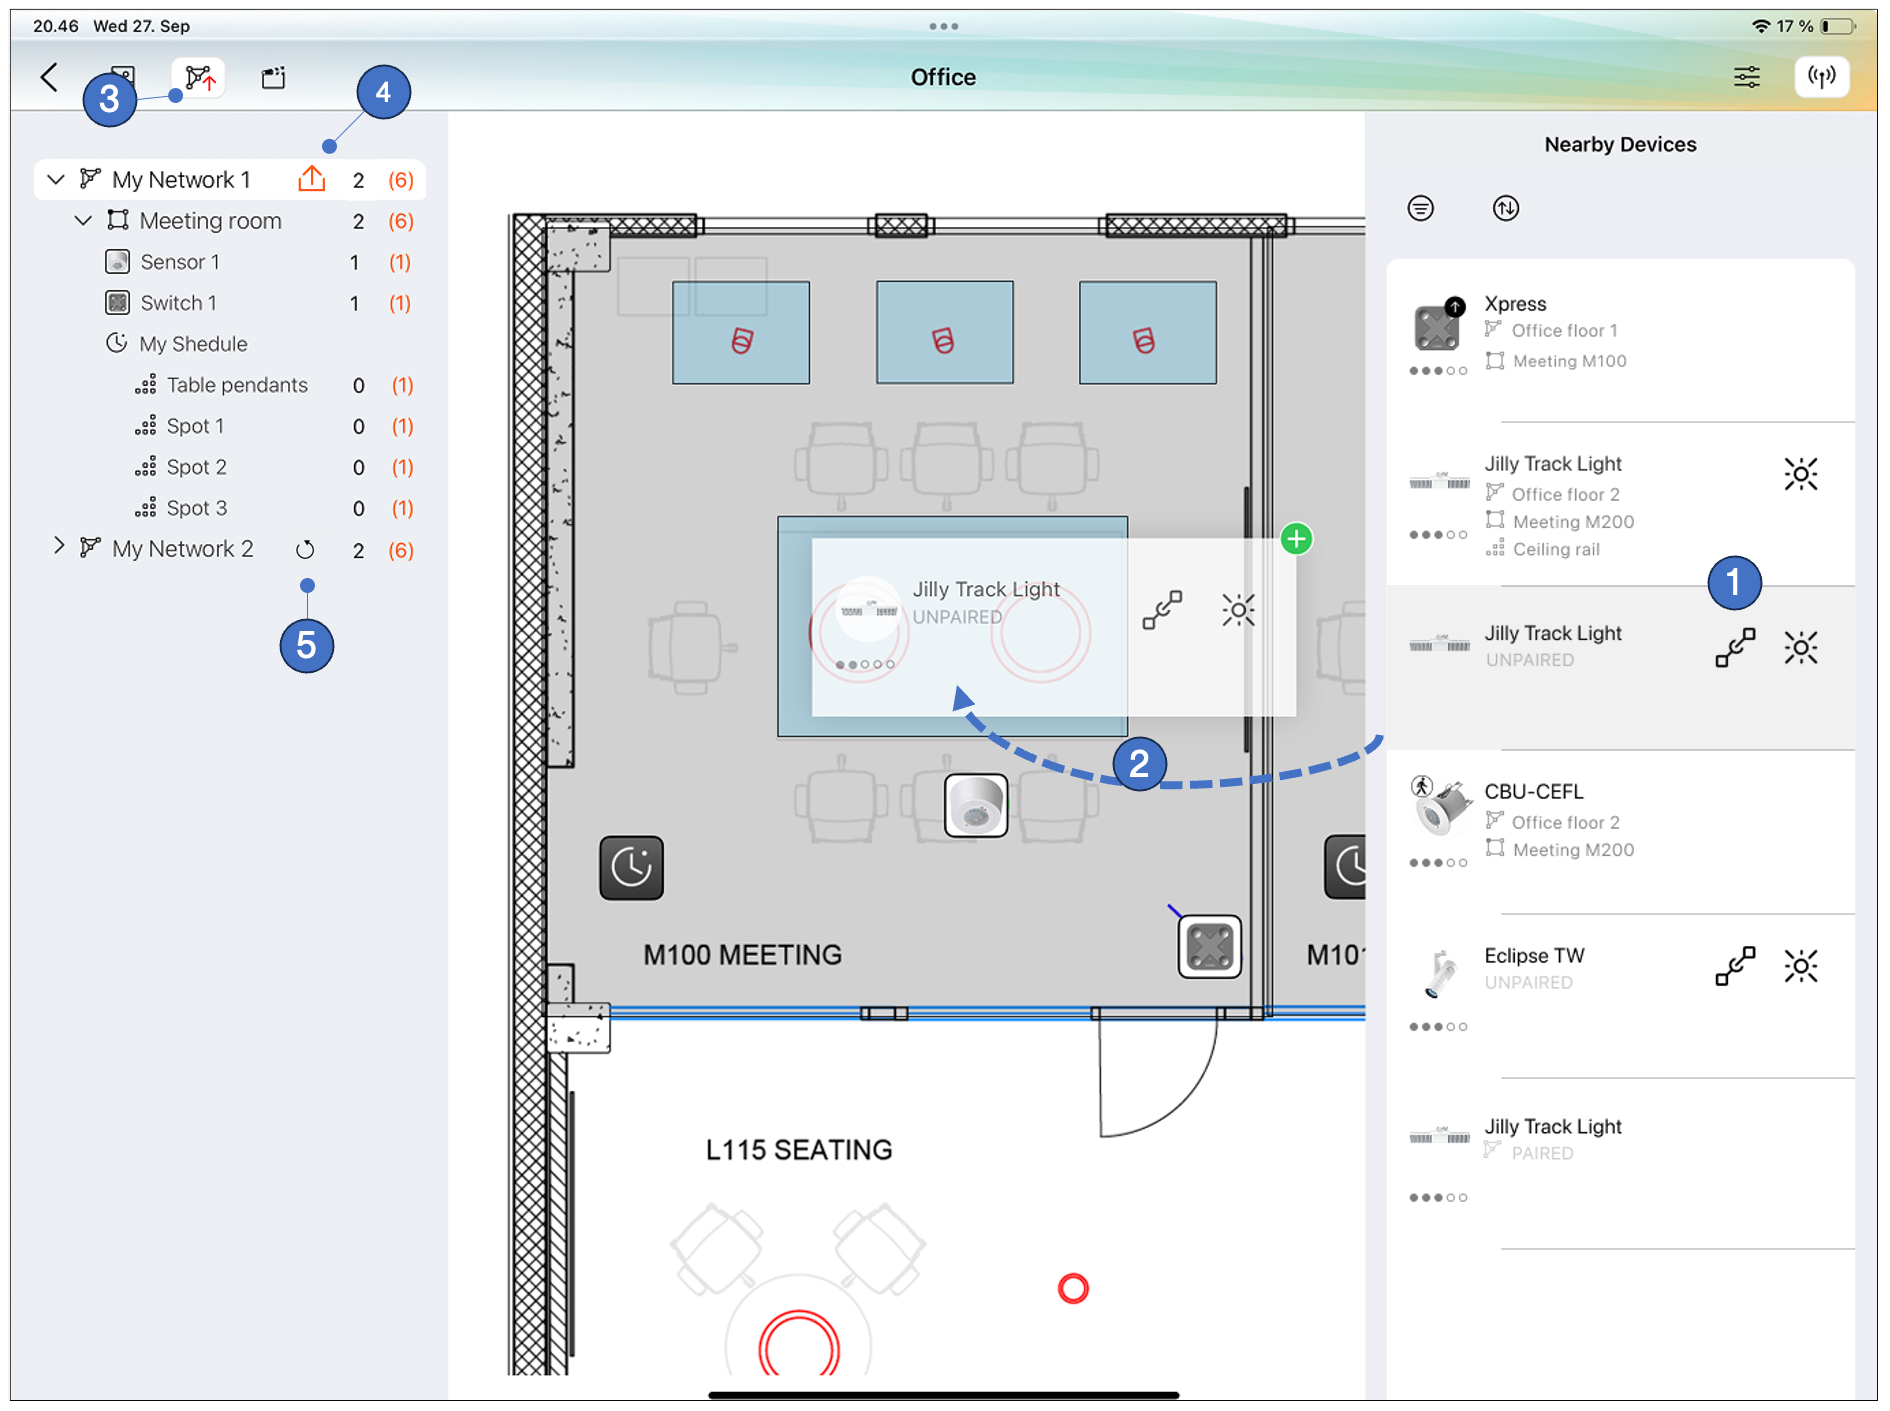
Pairing method 1: Select the target object (for controllers) or target group (for luminaires) in the layout, then tap the Pair button in the device list, OR
-
Pairing method 2: Long-press the device row in the Nearby Devices list and drag and drop it onto the desired target (a space, placeholder, or group, depending on whether the item is a controller or a luminaire).
- While dragging, an indicator icon (a plus sign or deny symbol) appears in the top-right corner of the dragged item to show whether the drop target is valid.
- If the target location is not linked to a network, an error message appears explaining why pairing cannot proceed.
noteWhen device pairing is in progresss, the pairing icons for other devices in the Nearby Devices list are disabled until the ongoing pairing is finished.
-
If an animated arrow appears next to the Networks icon in the top bar, it indicates that configuration changes in one or more networks have not yet been uploaded.
-
An Upload button appears on the network row whenever there are pending configuration changes for that network. Tap this button to upload latest configuration to the network.
-
A circular Reload button* can be used to reload and reapply the configuration to the network.
Adding kinetic switches and sensors with iPhone
Casambi Pro for iOS offers identical functionality on iPad and iPhone, except for commissioning kinetic devices (such as EnOcean switches and sensors), which requires an iPhone. iPads lack the built-in NFC reader necessary to scan and configure these battery-free devices, whereas iPhones include native NFC support for commissioning.
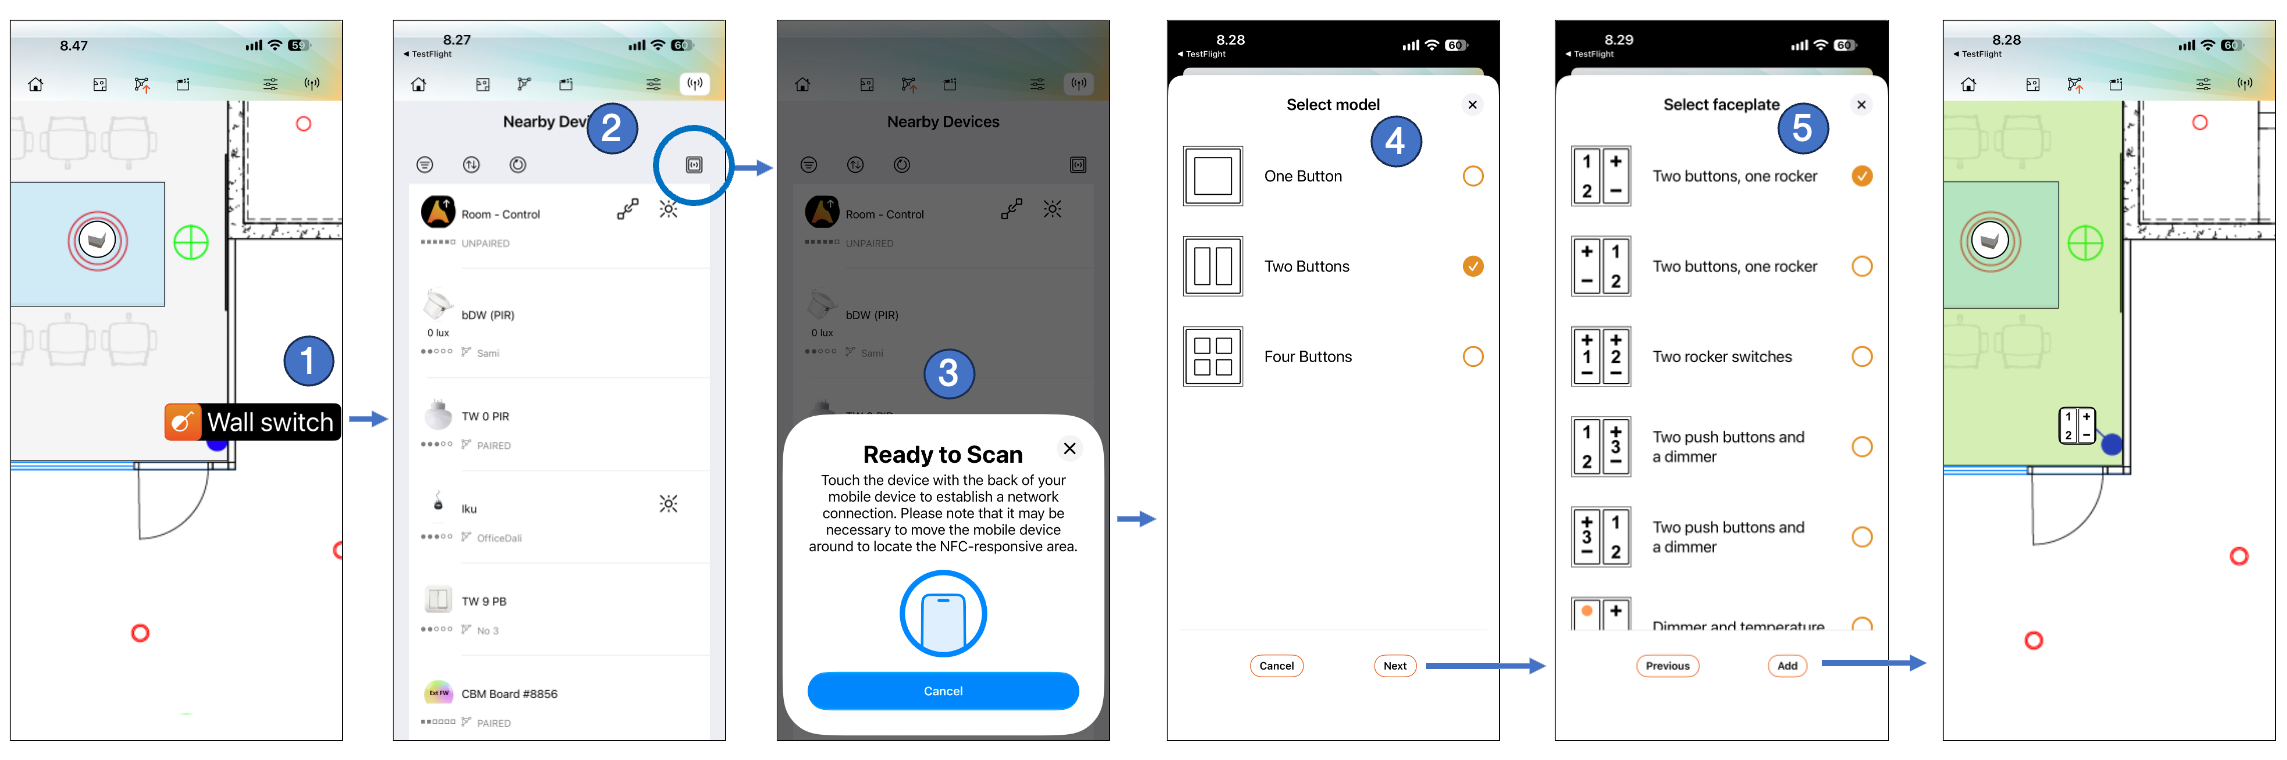
UI flow for adding a kinetic switch with iPhone:
-
(Optional) Tap an existing switch placeholder on the layout.
- If a placeholder is selected, the physical switch will replace it and automatically inherit all pre-programmed configurations (such as button assignments and scenes).
- If no placeholder is selected, the switch will be added as a new unconfigured device that you must configure manually.
-
Open the Nearby Devices list and tap the Add kinetic device icon (NFC icon in the upper-right corner).
-
When the Ready to Scan prompt appears, hold the back of your iPhone against the switch to scan its NFC tag. You may need to move the phone slightly to align with the switch's NFC antenna.
-
In the Select model view, choose your switch configuration (e.g., Two Buttons), then tap Next.
-
In the Select faceplate view, choose the matching button layout/faceplate and tap Add to complete pairing.
Kinetic sensors
Kinetic sensors follow the same pairing workflow, but skip the model and faceplate selection steps. Like switches, pairing a sensor to an existing placeholder will automatically apply the placeholder's pre-configured settings.
- To speed up the pairing process, network configurations are not automatically pushed across the entire network after every individual device is paired. Once all pairing operations are complete, manually push the latest configuration to the network by tapping the Update button in the network list (item 4 in the image above).
- In rare cases, a newly paired device may fail to appear in the layout or Project Explorer (becoming a "ghost device"). Although the physical device is correctly paired to the network, Casambi Pro has not registered its location. To resolve this, unpair the device via the Nearby Devices list and pair it again.
- Kinetic switch faceplates can be changed only in Casambi Pro for iOS. Changing the faceplate is not possible in Casambi Pro for Windows.