Creating a scene
New scenes can be created and edited in both Windows PC and iOS versions of the Casambi Pro by using the New Scene button in the Scenes pane. Note, that scenes in Space Templates can be created and modified only in Pro for Windows.
Creating a scene in Casambi Pro for Windows
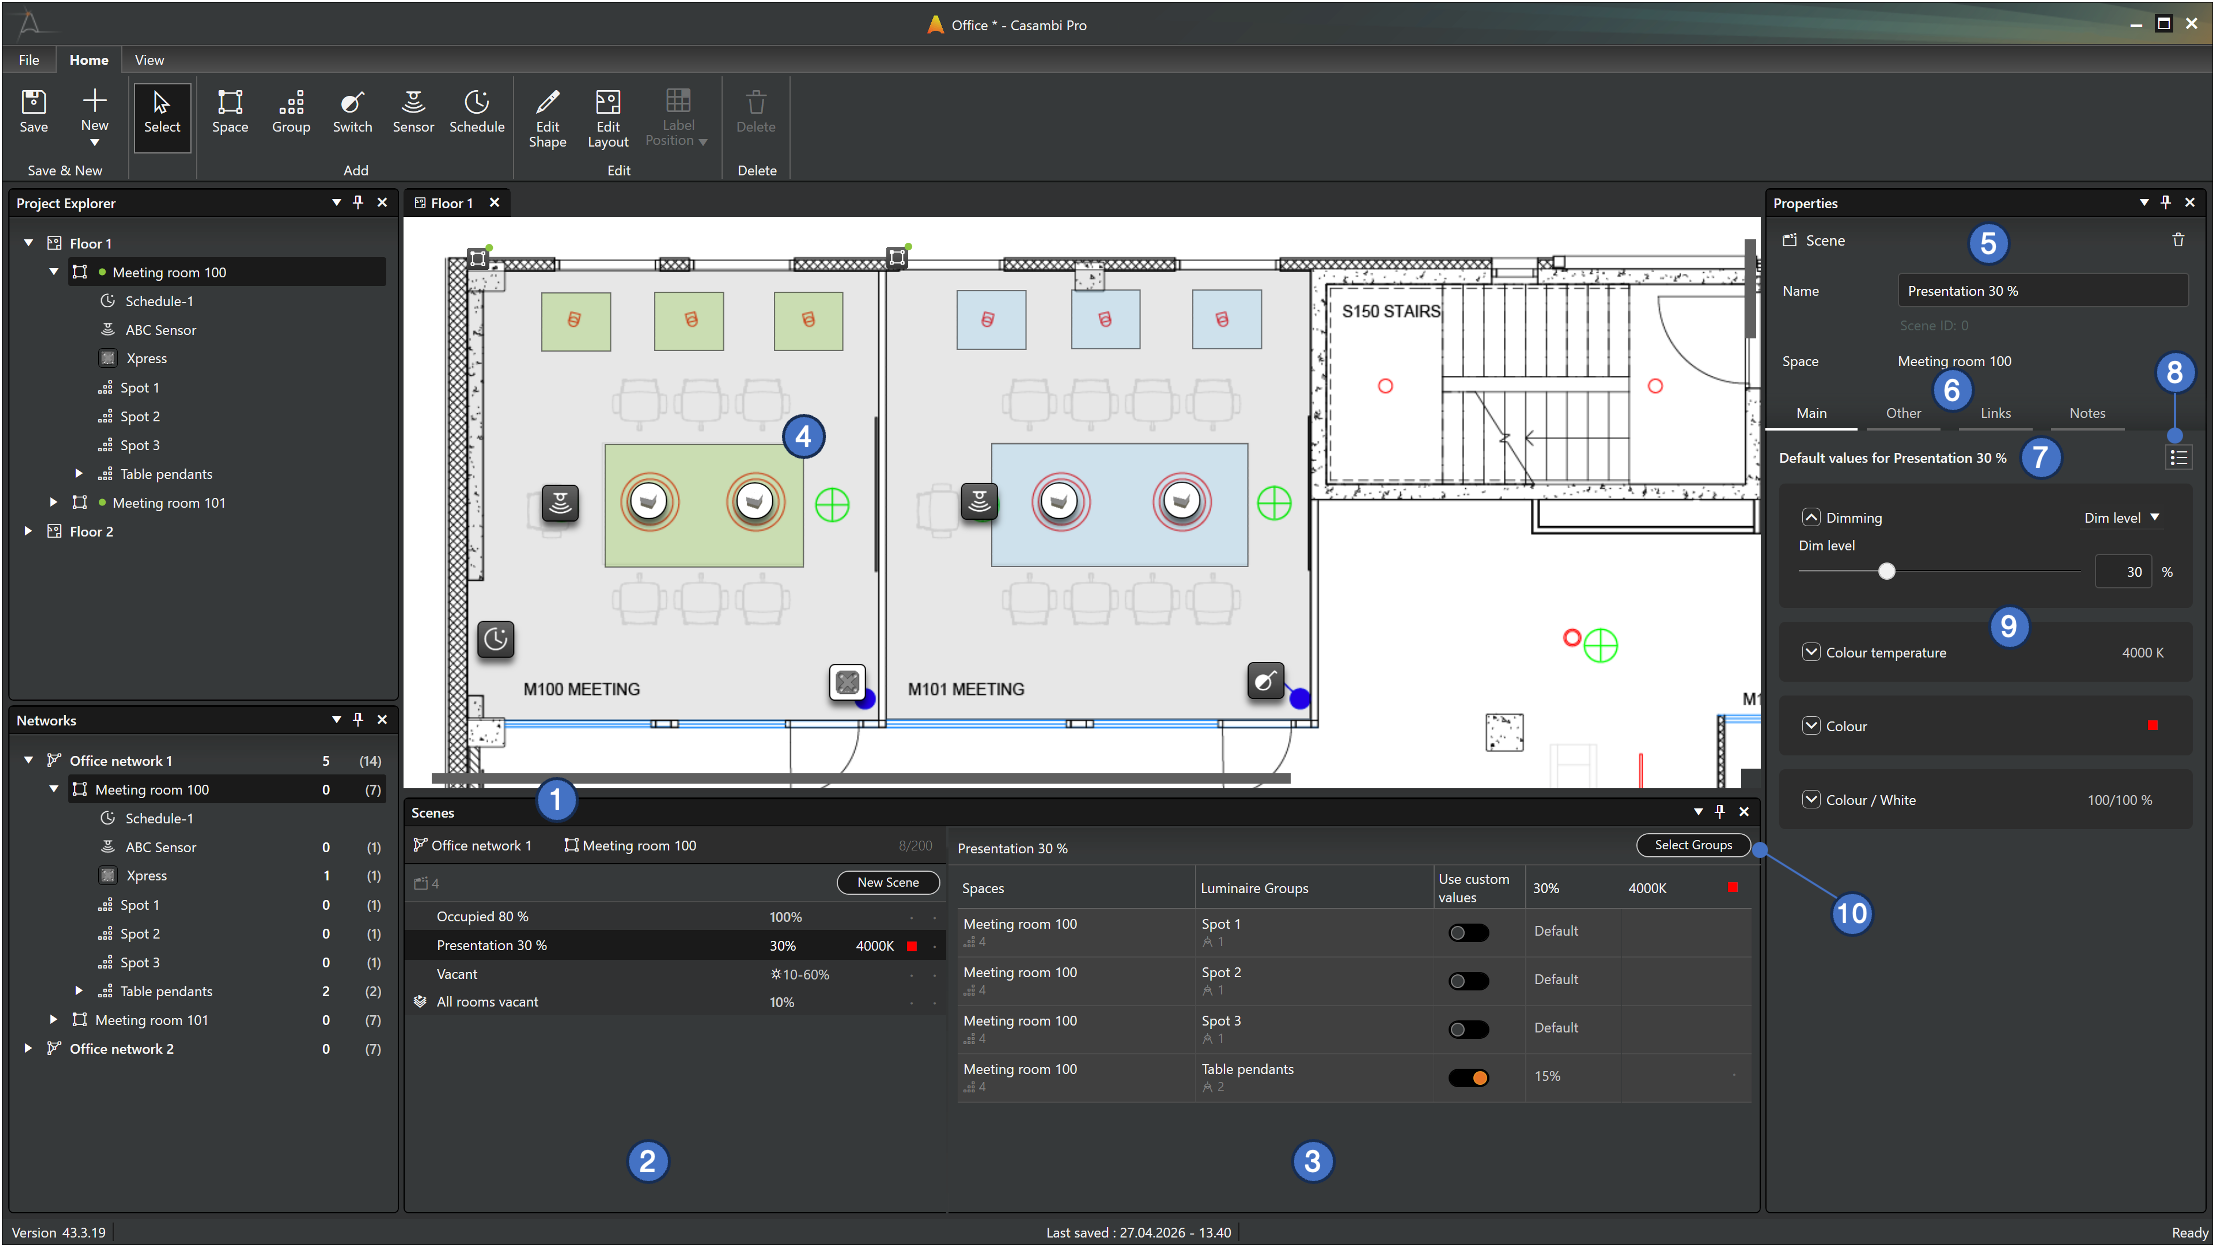
Before creating a scene, select either a network or a scene, to see the scene list in the Scenes pane.
- Alternative methods to create a new scene:
- In the Scenes pane, click New Scene to open the New Scene dialog.
- Right-click a space in the layout and select New Scene from the context menu.
- Select multiple luminaire groups from spaces in the layout, right-click, and choose New Scene.
Note: The selected luminaire groups must belong to the same network.
- Enter a Name for your new scene (mandatory).
- Set the default Dim level for the scene. The default value is 100%.
- Select the luminaire groups that will participate in the scene. You can select any group from any space within the current network. A scene must include at least one luminaire group.
- If a space was selected when the New Scene button was clicked, all luminaire groups in that space are pre-selected.
- If a network was selected when the New Scene button was clicked, no luminaire groups are pre-selected by default.
- If the currently selected space does not belong to a network, only its own groups can be selected for the new scene. After the space is attached to a network, luminaire groups from other spaces in that network can be added to the scene.
- Click Create. The new scene will appear as a new row in the Scenes list. The scene is automatically highlighted, and its properties can be adjusted in the Properties pane.
Learn more about the scenes pane in the Scene table and scene properties page.
Scenes in Space Templates can be created and modified only in Casambi Pro for Windows.
Creating a scene in Casambi Pro for iOS
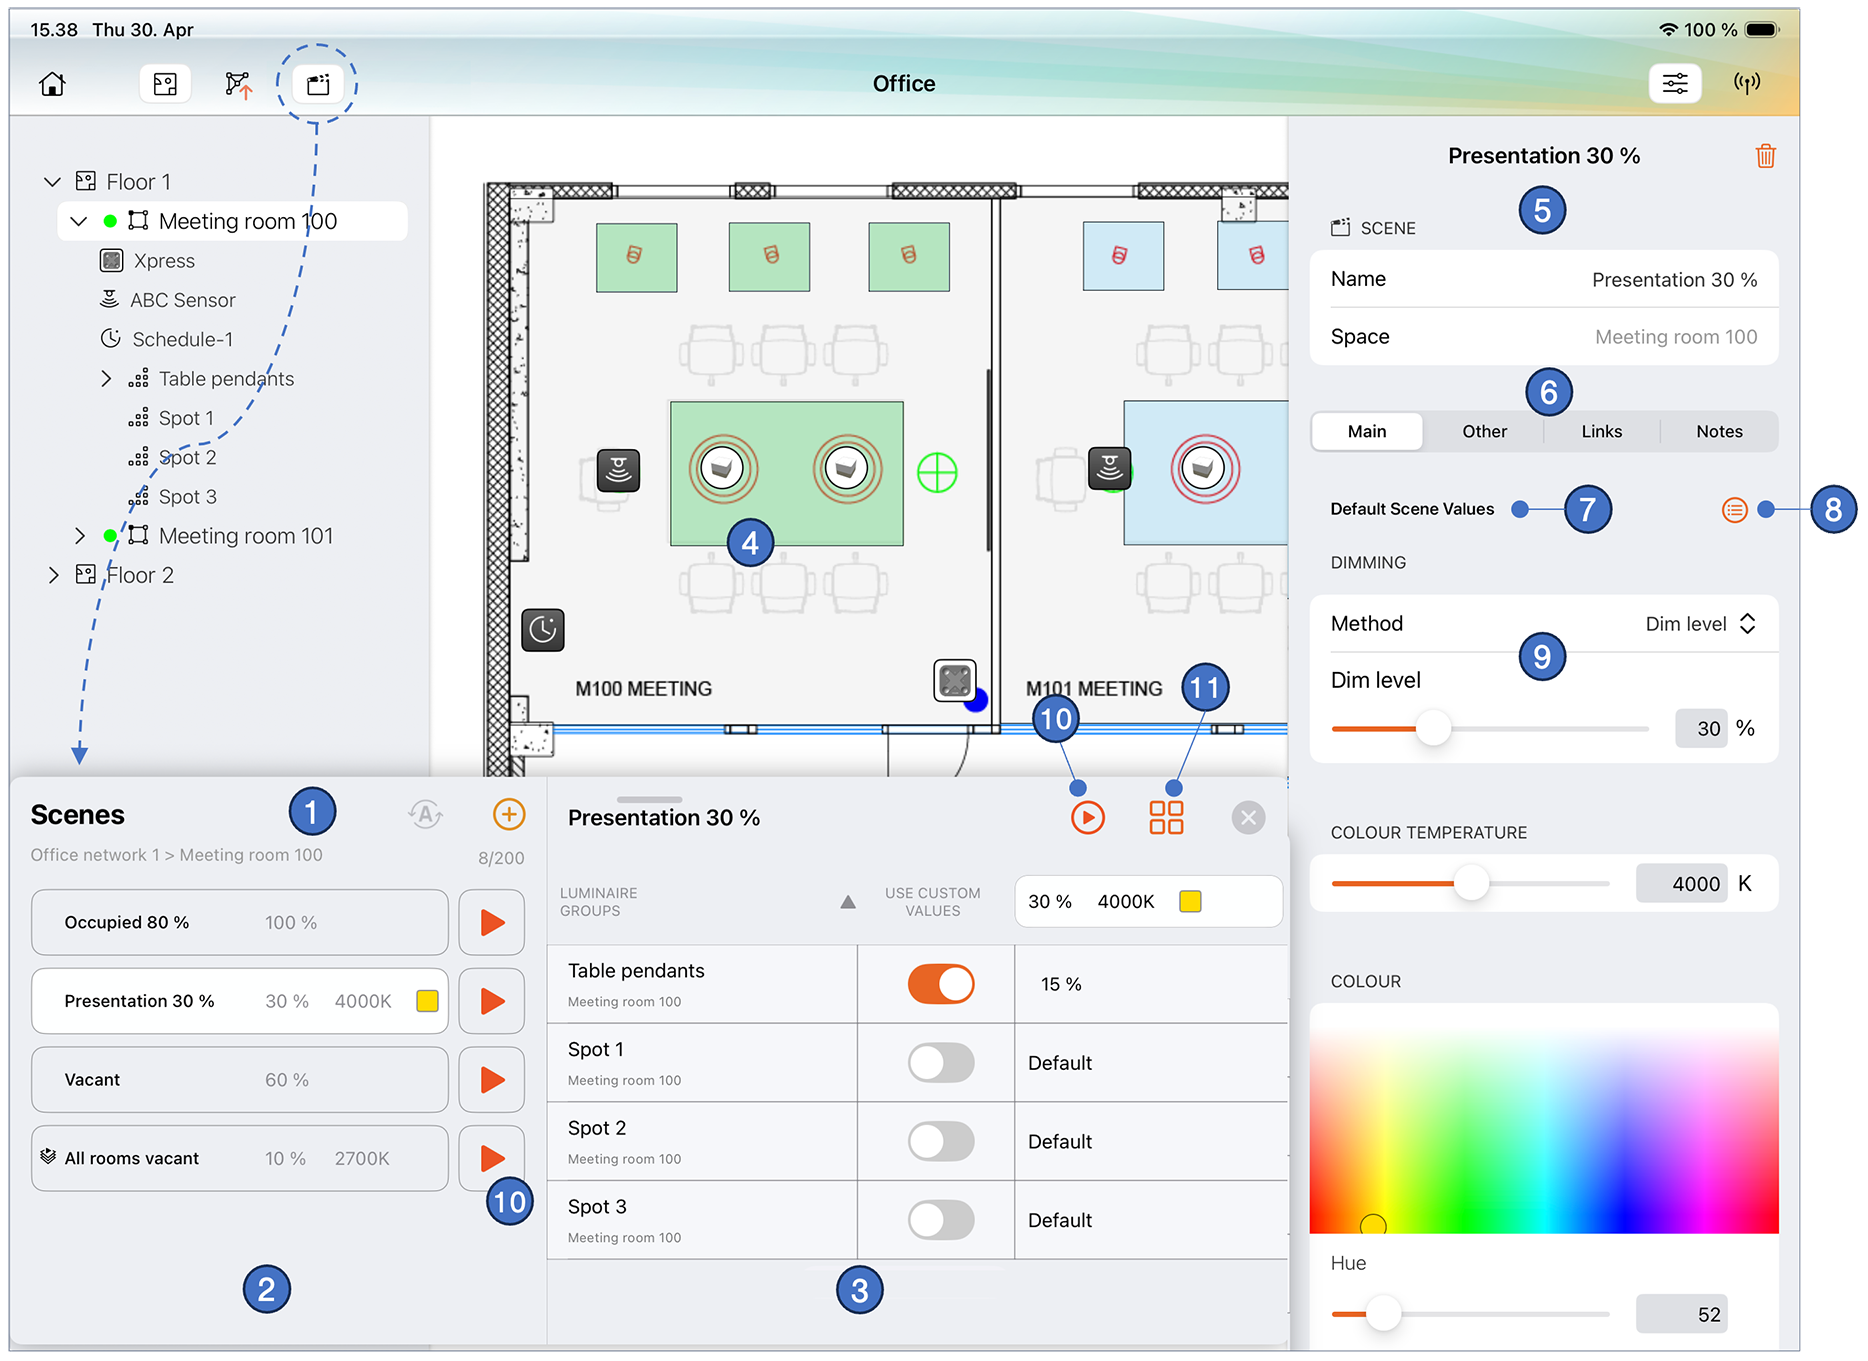
Before creating a scene, select either a network or a scene, to see the scene list in the Scenes pane.
- Click the New Scene button in the Scenes pane to open the New Scene dialog.
- Enter a Name for your new scene (mandatory).
- Set the default Dim level for the scene. The default value is 100%.
- Select the luminaire groups that will participate in the scene. You can select any group from any space within the current network. A scene must include at least one luminaire group.
- If a space was selected when the New Scene button was clicked, all luminaire groups in that space are pre-selected.
- If a network was selected when the New Scene button was clicked, no luminaire groups are pre-selected by default.
- If the currently selected space does not belong to a network, only its own groups can be selected for the new scene. After the space is attached to a network, luminaire groups from other spaces in that network can be added to the scene.
- Click Create. The new scene will appear as a new row in the Scenes list. The scene is automatically highlighted, and its properties can be adjusted in the Properties pane.
Scenes in Space Templates can be created and modified only in Casambi Pro for Windows, in the Space Template Editor.