Scenes
Overview to Scenes in Casambi Pro
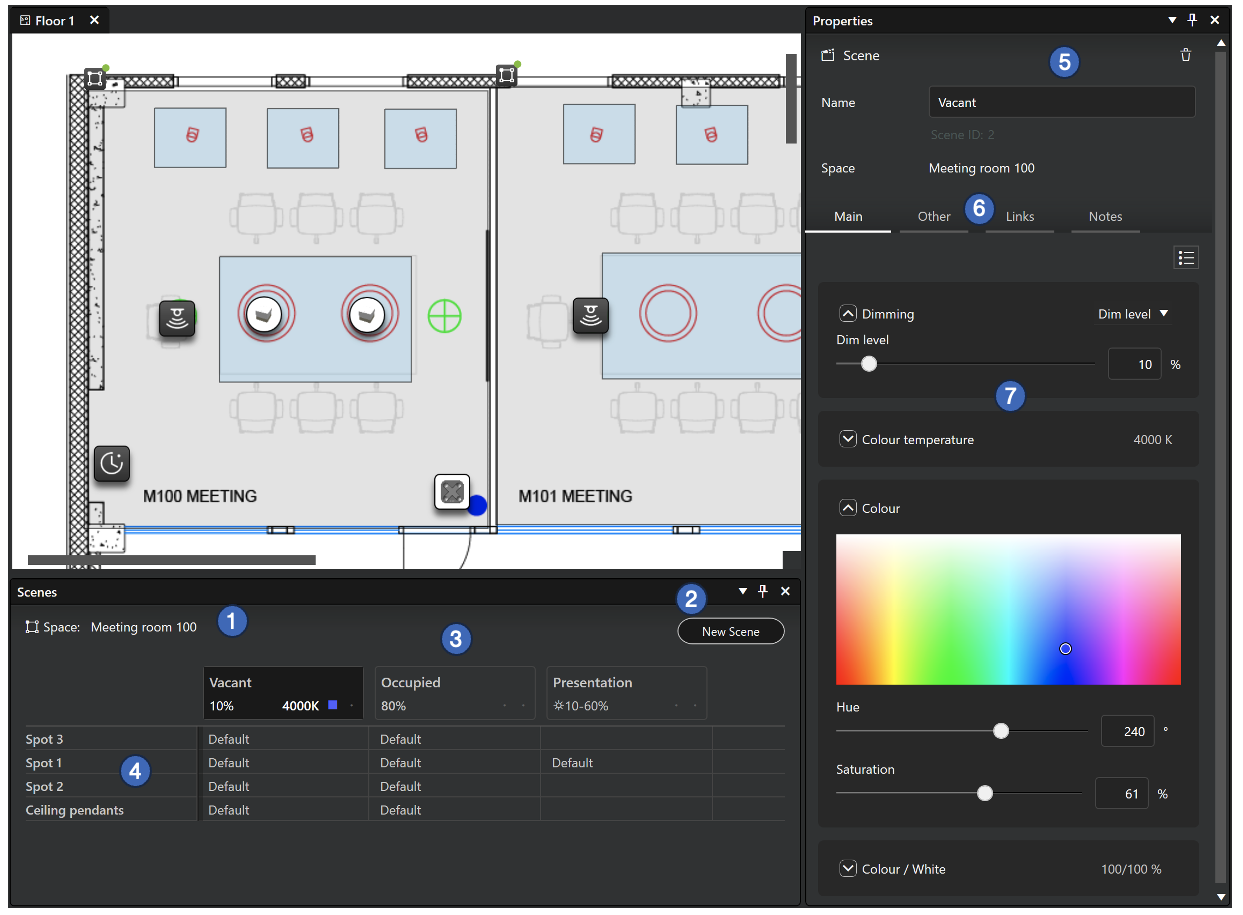
In Casambi Pro, scenes are created separately for each space. The Scenes table lists scenes in the selected space as columns and all luminaire groups in the space as rows.
Scene principles in Casambi Pro:
- A scene is always part of one space.
- Scene’s functional scope is its own parent space. Therefore, only the luminaire groups in the parent space can be included a scene.
- Scenes are triggered by controllers (sensors, switches and schedules).
- By default, every scene controls the dimming level of each luminaire group in the parent space. User can use the scene properties to add other lighting parameters to the scene (e.g. Colour Temperature)
- By default, every luminaire group is included in the scene, following scene’s default values. The default values can be overridden by setting group specific local values in the scene properties when a group cell in the scene table is selected.
- The Scenes table displays contents only when a space or an item inside it is selected.
- New scenes can be created both in Casambi Pro for Windows and Pro for iOS versions, by using the New Scene button in the Scenes pane.
Overview to the Scenes table and property pane in Casambi Pro for Windows:
- Selected space’s name is shown at top left corner of the Scenes pane. If the space is based on a space template, also the template name is shown here.
- New Scene button for creating new scenes. When the button is clicked, a dialog is opened where the scene name can be entered, and the default dimming level can be set.
- Scenes as columns
- Scenes are listed horizontally in columns. There is no limit how many scenes can be added. However, it is essential to keep in mind that in one network, the maximum total number of scenes is 250.
- The header row of each column shows the name of the scene and the default dimming level. If other parameters have been set, the colour temperature is displayed as Kelvin value and other parameters as icons.
- Each cell in the table can be selected by clicking it. Therefore, if the top cell in a scene column is selected, the scene default values are displayed in the properties pane.
- Luminaire groups as rows
- All luminaire groups in selected space are listed in the leftmost column of the table.
- Each row represents one luminaire group.
- Each cell in a row shows how the luminaire group responds when a scene is activated.
- Each cell in the table can be selected by clicking it. Single group’s behaviour in each scene can be edited by first activating a cell in the table, and then editing the parameters in the properties pane.
- Property pane’s top part displays general information for the selected cell in the Scenes table.
- If the topmost cell in a scene column is selected, the properties pane shows the default values for the scene.
- If a cell in a luminaire group row is selected, the properties pane shows the used values for the selected luminaire group in that scene.
- Scene ID is displayed below the scene name.
- The Main, Other, Links and Notes tabs display the parameters and values for the item that is selected in the Scenes table.
- When the scene header or an individual group cell is selected on the table, the adjustable parameters are displayed in the properties pane.
Notes about scenes
Notes
- Scenes can be deleted only in Casambi Pro for Windows.
- When a space is created by using a space template, the scene values can only be edited in the space template editor in Casambi Pro for Windows.
- Currently (November 2025) it is not possible to create scenes with larger scope than one space.