Creating a virtual network
Virtual (placeholder) networks can be created only in Casambi Pro for Windows. In Casambi Pro, a placeholder network can be configured just like a traditional Casambi network before the physical mesh network and its devices exist.
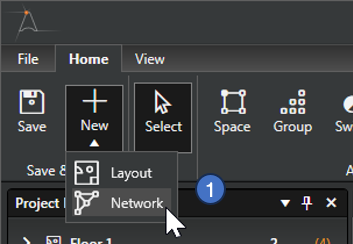
- Select the Network option under the New button in the ribbon. Alternatively, right-click inside the Networks pane and select New Network from the context menu.
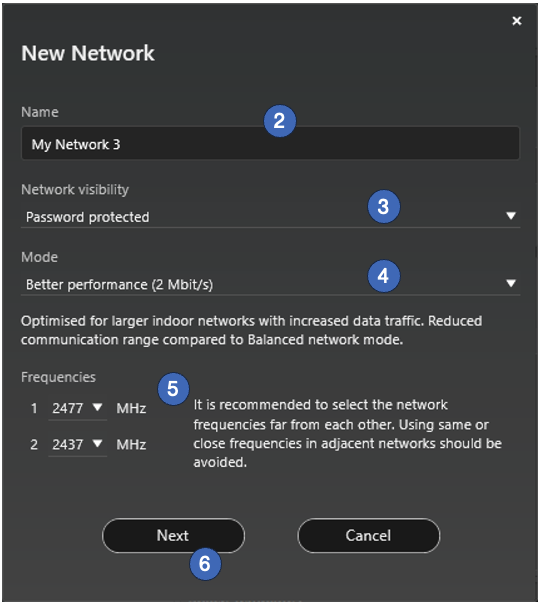
-
Enter a name for the new network.
-
Select a network visibility option:
-
Password protected: Only Administrators can control the network with the Casambi App. The password is set using Casambi Pro for iOS (see the Network properties page).
noteThis password grants only the control permissions only in the Casambi App; it does not allow changing the network configuration within the standard app.
-
Open: All users can control the network with the Casambi App. Changing the configuration of the network is not allowed.
-
-
Select the network mode. The network mode and frequencies can only be configured during initial creation and cannot be changed once the network is in use..
- Better performance
- Optimized for larger indoor networks with high data traffic.
- Offers reduced communication range compared to Balanced mode.
- Balanced
- Optimised for small mid-size indoor networks with moderate data traffic.
- Recommended for networks with a maximum of 125 nodes.
- Long Range
- Optimized for small to mid-size outdoor networks with moderate data traffic.
- Recommended for networks with a maximum of 60 nodes.
- Offers increased communication range compared to Balanced mode.
- Compatible with Long Range-capable devices only.
- Better performance
-
Adjust the frequencies used by the new network. Each parameter can be set using the slider or by entering a numeric value directly into the text field.
-
Click the “Next” button to proceed to next screen.
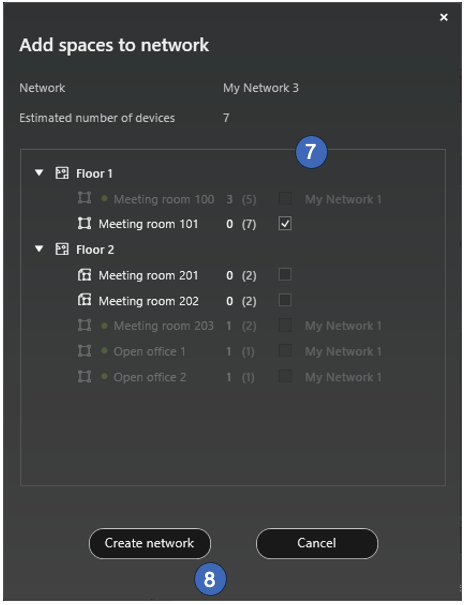
-
Assign spaces to the new network. All project layouts and spaces are listed in this view, and any spaces not yet assigned to a network can be selected.
-
Click the Create network button to finalize the network.
It is not mandatory to select spaces to the network at this phase, it can also be done later from each space’s properties.