Editing space templates
When there is a need to edit the control logic or add or remove elements in spaces created by using a space template, it needs to be done by editing the template itself. When a template is modified and saved, the changes are applied to all space instances created with that template. Template editing can be done with Casambi Pro for Windows only.
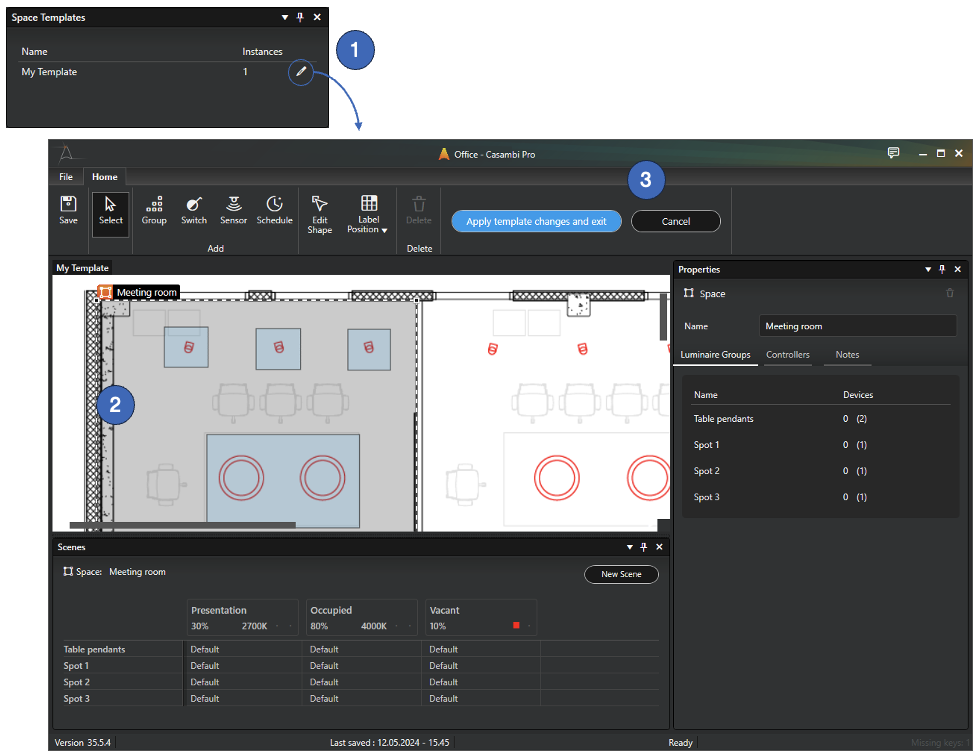
Editing a space template:
- Enter the space template editor by clicking the pen icon at the space template list in the main workspace
- In the space editor view, the original space is shown with its content. Luminaire groups, controllers and scenes can now be added, removed or edited.
- Modified template can be saved and applied to all space instances by clicking the “Apply template changes and exit” button. When this is done, the template editor is closed and all space instances in the project are updated.
- Clicking the Cancel button discards all changes in the template, and the child space instances are not updated.
note
- If something is added or removed, it will affect all child space instances.
- Luminaire groups or controllers cannot be removed from the template if there are real devices added to the related controller placeholders or luminaire groups in any of the spaces created with the template.
- Editing the geometry or positioning of the elements in the template does not affect the appearance of the already existing space instances created with the template. Geometry changes will be visible next time the template is used in creating a new space instance.
Deleting a space template
Space template can be deleted by selecting it in the Space Templates pane in Pro for Windows and pressing the Delete button in the property pane.
A space template cannot be deleted if there are space instances linked to the template. Thus, the child instances created with the template must first be removed before the template can be deleted.